By stepping back and taking stock, our engineer manages to rescue his own mix of guitars, bass and hurdy-gurdy for an Alt/Folk band!
The more I write about recording and mixing, the more I find myself discussing the project management side of things; when I look back at how a successful project came together, these issues often seem to me to have been at least as important as the technical and creative aspects. This month, I’ll explain how I navigated the mix stage of a project I’d been involved in from the start. Although I’d recorded most of it, the line-up of the band (an Alt/Folk act called ‘Allotment’) presented me with an unexpectedly challenging time when mixing.
 The basic ‘shaping’ EQ for the rhythm guitar.Allotment comprise two acoustic guitars, bass guitar, lead and stacked-backing vocals and, intriguingly, a hurdy-gurdy. We’d recorded the project in a modular fashion over a number of months, with most members coming in separately to record their parts, and the main guitarist recording remotely and sending his parts in. Before we began recording, singer-songwriter Rob Hughes and I discussed having a simple aesthetic that would run through the recording and mixing. I liked the idea of doing most of the work while recording, and keeping options usefully restricted during a very short ‘mixing’ stage — record it well, get a good balance, maybe add some simple effects and it should be done! This seemed to work swimmingly for the most part, but when nearing the point of sending the band some finished mixes, I hit a bit of a wall — I’d done all I’d wanted to, but it just didn’t feel ‘finished’. Mixing-wise, a period of ‘throwing some mud at the wall’ ensued, as I tried some much more technical mix processes than I’d intended. But I decided I should stop, step back, and try a different approach.
Setting Out My Stall
I’d noticed a trend whereby I’d work for about and hour on the mix of each song (there were eight) before I began to overcomplicate things and my enthusiasm waned. So, with that in mind, I decided each song needed more prep work than I’d usually do, taking each one to a point where I could mix quickly and instinctively. What did this involve? All the usual DAW organisation and some ‘template’ tweaks: a few starting points for reverbs on every song, and EQs and compressors loaded and ready to be used, if required. As the guitars that had been recorded elsewhere hadn’t been bounced from the right place, I fixed this and also made sure all the parts were in time.
While the above stuff is all fairly standard prep work, I also created a quick mix balance, so the track was almost semi-mixed in this initial stage. The idea was that everything would be ready for me to jump in and finish quickly in another sitting.
A Helping Hand
Struggling to find the right direction, and with no rough take to refer back to, I wanted to establish just what the band’s expectations were of their own sound before ploughing ahead. So, even though I knew things weren’t yet quite right, I decided to see how the band felt about a mix of one song. You need to tread a little bit carefully with this sort of thing, it’s very dependent on the relationship you have with the artist, and often the ‘first impression’ mix is hugely important. But having got to know the band reasonably well while recording, I felt we’d be able to solve the puzzle together and it was the right thing to do. They offered some good, insightful feedback.
For the most part, that feedback was positive, especially in regards to the vocals and the hurdy-gurdy. But while there was no specific criticism, I picked up on a faint vibe that it wasn’t quite right, so I tried to unpick this a little. There was a suggestion that things sounded a bit congested and that the guitars could have a bit more ‘sparkle’, and, importantly, that the lead acoustic guitar should play a slightly different role in the mix. These were useful insights, but this was clearly going to be one of those tricky projects that involves getting a whole band on board, rather than just following one person’s vision. ‘Mixing by committee’ in this way can be a very difficult thing if you haven’t encountered it before; if you’re not careful, it’s a great way to ruin a track! You must make everyone feel included, while ensuring the mix isn’t pulled in three or four incompatible directions. After talking to a couple of the band members on the phone, though, I felt like I had a good idea of three or four different areas I could look to work on in the mix.
Battling Congestion
One of my biggest challenges was that the band are, in effect, a full band, but minus the drummer — there was no conventional ‘foundation’ to build a mix around. I’d decided that Rob’s rhythm acoustic guitar and vocals had to be slightly out in front but, perhaps predictably, the feedback from the rest of the band was that the other guitar and the bass needed to be louder.
 Looking at the main acoustic guitar first, I’d used EQ to remove everything below around 90Hz, and a little around 300Hz. This, combined with a little shelving boost at 12kHz, gave me a more defined acoustic guitar sound that was great in isolation. The band had mentioned the word ‘congestion’, however. As is often the case, the ‘body’ of each instrument and the vocals in this track all resided somewhere between about 100 and 200 Hz. You can try to manage this with EQ cuts and boosts, but too much of this can thin a mix out, leaving things sounding a bit ‘carved up’.
An important contribution to tackling the congested low-mids was reworking the fingered bass guitar’s slightly rumbling ‘dubby’ tone. Its main energy was around 50-120 Hz, with very little going on above 800Hz, and with no drums, any issues with it were left rather exposed! Listening on my monitors, or anything resembling a full-range playback device, the bass seemed quite happy to rumble away below the guitars. But there was a clear point, level-wise, at which the bass ‘clouded up’ the whole mix, and I needed to ensure the bass had sufficient impact on more restricted-range consumer playback devices.
For the initial mix I’d sent to the band, I’d split the bass into ‘low’ and ‘high’ channels that I could control separately. The ‘low’ channel contained everything below around 200Hz, and I’d compressed this quite heavily to create a solid foundation. For the higher part I tried to boost the highest usable frequency content as much as possible in the hope it would give the bass sound more definition. It seemed a sound tactic at the time, but coming back to the mix I realised it caused as many problems as it solved. The enhanced mid-range was competing with the main ‘action’ of the lead acoustic guitar, and the bass was generally beginning to sound a bit too mucked around with. It also struck me that I’d approached the mix as if I were mixing a traditional band, where you might start to mix by building around the rhythm section. I decided to make the bass leave space for the guitars, rather than the other way around, so I removed all my bass processing, returned it to its natural state, and focused on finding a good strategy for the guitars.
Opposites Attract
In my first mix, I’d opposite-panned each of the two guitars about 45 degrees off centre, so they demanded to sit consistently at a similar level. That’s fine when you have the traditional drum and bass elements down the middle, but here things sometimes felt lopsided, to the extent that I found myself gradually panning the guitars closer and closer to the centre. So I decided to change my approach. The bass guitar and lead vocal were always going to be slap in the middle, but I decided I’d bring the main rhythm guitar much closer to them (around 15 percent left); it felt very much at the heart of things here, without needing to be louder than the other instruments.
 The lead acoustic guitar part was not only treated to some fairly detailed EQ’ing, but was also panned to one side and sent to an aux channel on the opposite side. Here, the sound was treated to a SansAmp distortion plug-in and some spring reverb to mimic the amped setup used by the band on stage.
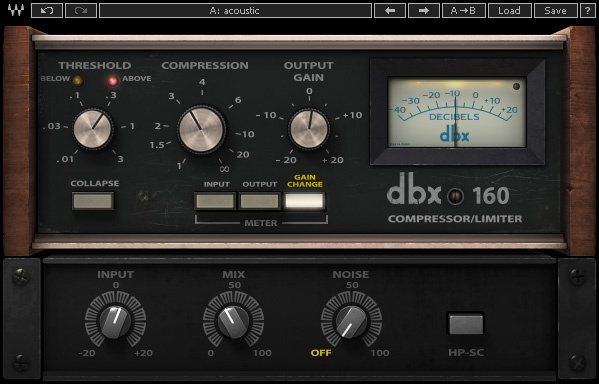
 Conventional EQ wasn’t cutting the mustard when trying to control the low mid-range of the acoustic rhythm guitar, so Neil turned to Tokyo Dawn Labs’ Nova GE dynamic equaliser, which left more of the wanted sound intact when EQ cuts weren’t required. The part was also treated to parallel compression via a dbx 160 emulation, to give it some solidity. I liked this change immediately, but needed to find a way to present the other, more lead-style, acoustic. My solution was to pan this guitar track almost hard right, but to send some of it to an aux channel on the opposite side. I treated this aux almost as if the guitar was going to an amp, as the band had mentioned that this is how it would be when they played live. Using Pro Tools’ Sans-Amp plug-in and Softube’s Spring Reverb, I fashioned a dirtier, reverb-heavy version of the part and set it just at the point of being audible. A quick check confirmed that nothing weird was happening in mono, and I felt that the battle was turning in my favour.
 Things sounded much more confident with this new panning, and it felt a lot easier to balance the levels. I still needed to massage those low-mids, though, so I turned my attention to the rhythm acoustic guitar. Removing any of its low energy (centred around 200Hz) with a conventional EQ, the part felt too thin, so I turned to Tokyo Dawn Labs Nova, a clever and very affordable dynamic EQ plug-in. I set the EQ curve for a reduction of around 3dB and experimented with the threshold so that it only kicked in at the sections where the 200Hz build-up was at its worst. This work well, and after also adding a touch of parallel compression, the acoustic felt solid and full, without taking up more space than it required.
Return Of The Bass
 A snapshot of the frequency content of the bass guitar without any mix processing.With the mix as it was, when I muted the bass part the song already had enough body. It wasn’t thin and didn’t lack weight. So the bass no longer needed to make a big contribution to the mid-range; it’s job was a relatively simple one of filling out the part played on the rhythm guitar. If you heard it on a full-range system you’d get the whole picture, but if the mix found its way onto, say, a smartphone speaker, it would sound fine without the bass.
 The troublesome bass part was another one that didn’t seem to take conventional EQ well. In this instance, Neil used Sound Radix’s clever Surfer EQ2, which can move its EQ bands’ frequency in relation to the pitch of the incoming signal, keeping the timbre consistent.I described above how I’d ditched all my original processing (conventional EQ and quite heavy split-band compression); while that works on a lot of tracks, it left things here sounding a bit smeared. In the end I managed to solve things with a more natural approach, but only thanks to a very clever processing tool: Sound Radix’s Surfer EQ 2. This wonderful plug-in tracks the pitch of the incoming signal and can shift your EQ curve in relation to the pitch. It almost felt a bit like cheating, but once I’d dialled in a static 3dB cut that sounded nearest to what I wanted, I switched it into Surf mode and Surfer EQ moved this swiftly between 50, 65, 73, 97 and 116 Hz in time with the bass part, thus cutting without the timbre changing awkwardly from note to note. Very clever indeed! With a little EQ boost around 1kHz, this gave me a full, even, and much better-defined low-bass sound throughout the song. I didn’t need to be so heavy handed with compression, and it was now easier to balance the bass against the guitars. With the low-mid of the guitars under control as well, the bass sat nicely in its own little area, just below everything else.
 The bass part was also treated to a more general boost around 1kHz, courtesy of Sound Toys’ characterful SIE-Q plug-in.
Hurdy Gurdy Man
 In addition to a little compression and Mid-Sides balancing, the hurdy-gurdy was EQ’d to remove some harshness, and to carve away some low frequencies which, in the context of this particular track, were intruding on other parts, and otherwise contributing little of real use.It’s not every day you encounter a hurdy-gurdy! I’d recorded this unusual instrument using a Mid-Sides stereo array, so I could balance and process the Mid and Sides channels to taste, and its role was supportive; it wanted to sit just behind the other instruments, filling out the left and right sides of the mix without disappearing completely in mono. This is the beauty of M-S recording: if you switch your monitoring to mono for a moment you can set the Mid to a sensible level in the mono mix and, switching back to stereo, add in as much Sides as you want for greater stereo width (the Sides signal inherently drops out in mono). I used Softube’s CB1 compressor to smooth the swells in level a little, and an EQ took down some harshness around 2-3 kHz. I also rolled off some low frequencies that just weren’t necessary in the context of this mix.
Pulling It All Together
As I mentioned, one of the main challenges for this project was to make sense of multiple band members’ feedback and ideas of how the band should sound. This scenario can be disheartening, so I was lucky that Allotment are one the nicest bands you could hope to work with! At the end of the day, we all wanted the same thing — for the project to be the best it can be. Rather than attempt to make sense of abstract terms like ‘sparkle’ and ‘shimmer’ though, I got the band to really examine how they saw themselves, and give me clear ideas for things we could try that were within our control. Consequently, the second mix I sent to the band went down really well, with the exception of one band member who still had a few issues. I encouraged him to give me a call, and a constructive chat later we agreed that I should try a mix with more movement in the level of the guitars, particularly in the sections when there were no vocals. I was happy to do this, and after a touch more fine-tuning we’d arrived at a sound around which we could build the album.
Final Thoughts
So, as I suggested at the outset, the mixing for this project turned out to be far more complicated than we’d all anticipated! That’s just the way it pans out sometimes. It’s great when you can breeze through a mix and enjoy the process, but the more challenging projects like this are the ones in which we really learn and improve. Much of mixing is about problem solving; you must work to understand what the problem is, what degree of control you have to influence things, and decide on some possible strategies. You certainly can’t solve everything by piling on the plug-ins.
For this mix, I had to stop myself from thinking of the band as a ‘standard band minus the drums’. Once I’d figured that out, I was able to find a better overall balance, and arrive at a better way of panning the different elements of the band. After this the hardest work was in sharing around the low-mid area so that everything felt full, without the overall mix becoming too thin, cluttered, or muddy. The key to my achieving this was some good, broad EQ decisions, paired with some slightly more sophisticated dynamic processing tools such as Surfer EQ 2 and the Nova dynamic EQ. These enabled me to only remove problem frequencies when necessary, allowing the instruments to return to a more natural tone wherever possible. Those solutions were easy: the hardest part was figuring out what the problem was in the first place!
I felt comfortable and secure enough to bounce some ideas off the band in this instance, but if that isn’t appropriate, I have a few trusted people I might confide in if I felt I’d become stuck. A fellow mixer, mastering engineer or even a musician with no interest in the engineering side of things, might just provide that sliver of insight that helps solves the puzzle.
Remixed This Month
With members spread around Suffolk and Cambridgeshire, Allotment are made up of Rob Hughes on guitar and lead vocals, Steve Bradshaw on lead guitar and backing vocals, Glenn Jobson on bass and Simon Sparrow on hurdy-gurdy and baritone vocals. Intriguingly, they describe their sound as traditional, alternative, retrospective, standing-still dance music.
Audio Examples
You can find a number of audio examples to accompany this article on the SOS web site.